Do you have a big lawn that needs to be watered every day? Are you concerned that you do not have free time to water your garden often? Or are you tired of having to bring the heavy hose around every time?
If you worry about these issues, we are here to help. As many gardeners recognize, a sprinkler system is a very convenient means to water your garden. However, hiring a professional to install one can be problematic for some people because of the high cost. In that case, what can you do to build a sprinkler system?
Well, we highly recommend you to make it yourself. Though a do-it-yourself method may take quite a long time to finish, it can save you a lot of money.
Now, let's go through step by step to design a sprinkler system for your yard!
1. Determine the flow rate and water pressure
First of all, you need to decide from which source you want to get the water for your irrigation line and then calculate the flow rate and to water pressure of that source to determine how many sprinklers you can have on the line.
To find the water pressure, you can simply use a water pressure testing gauge and attach it to the spigot of your water source (for example, the hose). To find the flow rate, you can grab any bucket that you have then turn the water from your source on fully. While waiting for the water to fill the bucket to the top, record how long it takes to do so.
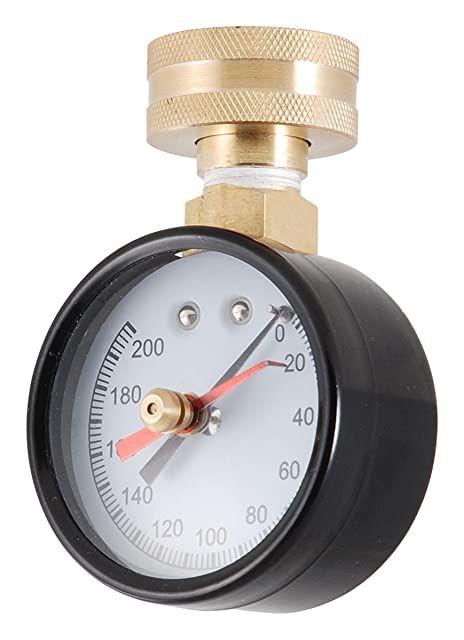
Once you finish, multiple the size of the bucket (in gallons) by 60 seconds. Divide everything by the time the water source takes to fill. And there you go, that result will be the flow rate (in gallons per minute).
2. Choose your desired type of sprinkler heads
There are many types of sprinkler heads with different water pressure, flow rate, and coverage. Some sprinkler heads can rotate, and others cannot.
There are actually 3 different types of sprinkler heads, which are based on how the water will be distributed to the plants.
Spray heads: These are also called the fixed spray heads that release water to the outside in a fan-shaped pattern. Their coverage is pretty low as they can be only placed up to 18 feets apart. To operate properly, they need 20 to 30 PSI of water pressure.
Rotors: They will not be fixed like the first type, but rotating. One of their examples is the Rain Bird Sprinkler. This sprinkler head has a pretty high coverage. Two heads can be put from 8 to 65 feet apart, so make sure you look at the information for your chosen model before purchasing. The rule for determining the right sprinkler head for a specific water pressure is the water pressure at the rotor head in (PSI) must exceed the distance (feet) between the heads.
- Rotary Nozzles & Rotators: They work exactly like the rotors, but they appear to be much smaller. They are considered more efficient than other types since they produce less evaporation of water before it reaches the ground. Their radii usually range from 15 to 35 feet.
When you are done choosing the sprinkler head, you can check its water pressure and flow rate on the manufacturer's website. Compare those numbers with your water source's figures to determine how many heads you can install on your irrigation line.
3. Determine the layout of sprinkler system
Think about the layout of the waterflow is a critical part before you start connecting the pipe.
You have to decide where you want to install your irrigation line. By doing this, you know where to dig a trench to bury the line. And you know how long the line needs to be to cover your desired zone. Usually, the depth of your irrigation line underground ranges from 8 to 12 inches.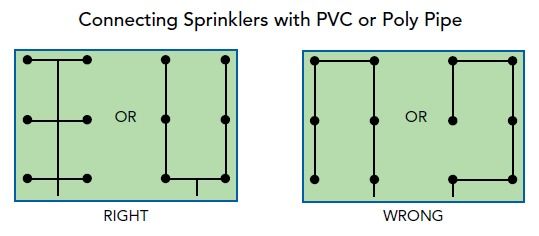
As you finally choose areas to put your sprinkler line, you can start trenching soil, which is going to take you a long time if the soil is dense.
4. Design your sprinkler line
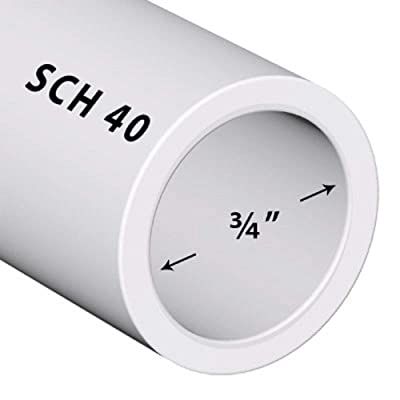
This is the central part of the entire process, but it is too difficult to do. Firstly, you need to buy materials to build the line. We suggest you buy more than you need as you can return things you do not use later. You will need to purchase:
If you do not have any hardware store nearby, you can get all materials on Amazon. They are very affordable.
| 3/4-inch Schedule 40 PVC Pipes | ||
3/4-inch PVC Pipe Tee | ||
3/4-inch PVC Pipe Fitting | ||
1/2-inch Sprinkler Riser | ||
PVC Cutter Tool | ||
One-step PVC Glue |


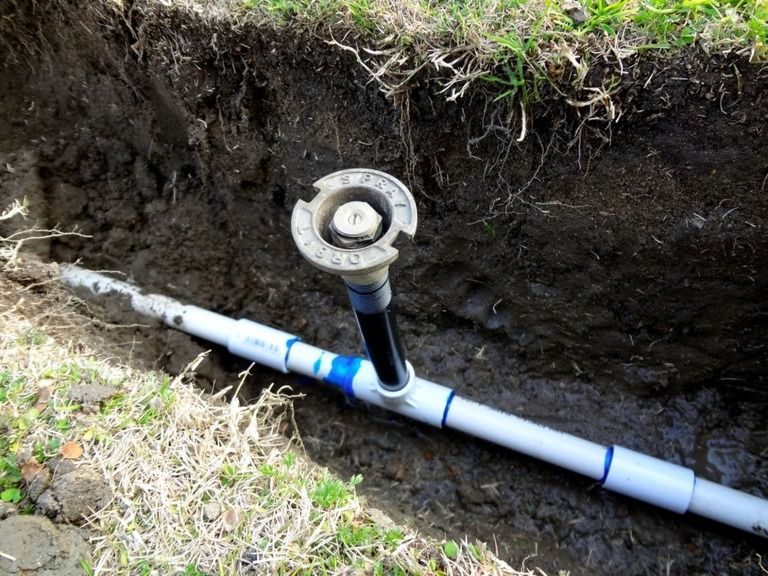
Once you successfully gather everything listed above, you can move on to build your sprinkler line. Lay the pipes on the underground path you have just made. You can adjust the length of the pipe by cutting it using the cutter tool.
Or you can connect two pipes through a pipe fitting and stick them together using the glue. When you reach an area where you want to install a sprinkle head, use the pipe tee in between pipes.
Then, use the sprinkler riser to attach the sprinkler head to the remaining end of the tee joint. If you wish to place your sprinkler header, you can switch a taller riser to increase the height of the sprinkler. Make sure you hold all the disconnected pieces together tightly by the glue so that the water has nowhere to leak.
5. Connect the irrigation line with the water supply
We are finally at the last step of the process. For the connector, you would want to use a zone valve, which allows the water to flow from the supply to the irrigation line.
There are many different types of zone valves for you to choose from. There are zone valves that can start the water flow manually when we turn on the valves. There are also zone valves that can operate on their own using timer.
We recommend you to use the anti-siphon zone valve because it can prevent the backflow of water that contaminates your drinking water.
To install the valve, connect the irrigation line to the outlet side of the valve and the water supply to the inlet side. Depending on the water pressure and flow rate of your water supply, you can add as many zone valves as needed.
6. Select the right sprinkler timer (Optional)
If you wish to kick off the sprinkler system manually, go ahead to skip this step and you are basically done. But if you want to save your time, it is highly recommended that you use a sprinkler timer which can also help you to water your plants at the right time. A sprinkler timer works to turn on the sprinkler system at a scheduled time. It allows you to set days to water, time to water, and also the duration of water being released from the sprinkler heads.
When choosing sprinkler timers, you will need to consider these following features.
The location of your sprinkler system: Indoor or Outdoor. Timers will come in these two different types. Indoor timers need to be sheltered from weather, and can be plugged into a 110-volt outlet. In contrast, outdoor timers are weather resistant, and generally have to be hard wired for power.
Number of zones: must be equal or higher than the number of areas that your system is set up.
Number of programs: can range from 1 to 4, but you should have at least 2 programs for flexibility.
A program in timers is a set of watering instructions for stations that will run on the same days. A timer can have up to 4 programs, namely program A, B, C, and D. Most of the sprinkler timers will have 2 or more programs. For example, in program A, you can set the days, the time, and the duration that you want to water. If you have 2 programs, you can set up two different watering schedules for different types of plants. Once the timer starts a program, it will go through the entire program before stopping or repeating the program.
Type of timers: Mechanical or Solid-State (Digital), though mechanical type is more affordable, solid-state digital is more convenient because it contains more features.
Below is the list of features available in sprinkler timers:
- Clock and calendar settings
- Manual start and station operation
- Master switch
- Master valve control
- Station omission
- Pump start lead
- Rain sensor
- Battery backup
- Non-volatile memory
- Delay
Conclusion
That is all you need to build a sprinkler system yourself. Before activating the system, you should wait for at least 30 minutes for the glue to cure. When finished, you can try running the system to see if there is any leakage and fix that problem immediately.
Once you are sure that everything works properly, you can put the soil back in to cover the irrigation line. You can see that it is not that hard to self-design a sprinkler system, right? It may be quite time-consuming, but you will get a sprinkler system at a low cost.
Give it a try and good luck!


