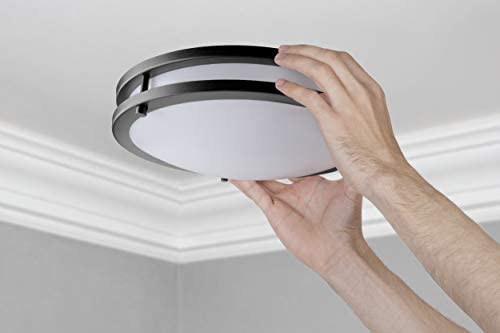
Lighting must be installed in newly built homes and deciding how to install recessed light bulbs is a good approach. You must determine the wiring of the lamp before installation. Modern homes benefit from the sleek, clean look of recessed light bulbs. Because you have to work with your arms overhead, installing recessed light bulbs can be a difficult, messy, and tiring job.
A professional electrician with knowledge of several techniques can speed up and improve the efficiency of your retrofit and installation process. As a result, your home will have a beautiful hidden lighting system that provides consistent, reliable lighting. Learn how to install flush mount light.

How To Install Flush Mount Light
Survey before installing recessed light bulbs
There are six concealed light bulbs, for instance, in the kitchen & breakfast area. Three switches manage their operation. The three smaller work lights above the counter, the four huge lights in the kitchen's center, and the four enormous lights are all wired together. In the breakfast area, there are different controls for the light just above the sink and one above the desk. As a result, we may adjust the lighting to our current needs.
Plan your wiring to go from one recessed light to the next in a sequence if you intend to add a series or group of them. An S- or spiral-shaped layout may be beneficial. The most challenging aspect of putting incident light in pre-existing ceilings is getting the lights to fit into the ceilings frame. The benefit of using new ceiling is that you can modify the area above the ceiling.
Determining the location to install the ceiling light bulb:
- Find the structure of the ceiling. This is a little more challenging for box ceilings because you cannot have seen the below at all. This is something to keep in mind if you plan to install the ceiling lamp from the start. You could also rely on the ceiling builder's knowledge. To prevent having to drill holes in the bone to insert the recessed light, they will demonstrate the proper skeleton to you. Using the stud locator to get a rough sense of the location of the ceiling bracing is another method for locating the bare bones.
- Mark the optimal spot for the recessed light installation using a pencil on the ceiling. Recessed light bulb placement and installation also need to meet certain aesthetic and technical standards. The brightness will be overly powerful if there are too many bulbs installed, and vice versa.
- Because the lamp type will determine the size of the base of both the recessed light bulb, which is often circular. Each light hole's cut should be marked using a template or a circular compass.
- The openings can be cut using a drywall saw or a jigsaw that has been turned outward.

Connect the wires with how to install the led ceiling light
The connector that separates the two wire ends of ceiling light bulbs is a standard accessory. Wires should be connected to lines rather than control switches before the lightbulb is fixed to the lighthouse. You ought to have a gutter hooked to the line that runs between all of your recessed lights. When a wire goes the full length and culminates within one of the electromagnetic junction boxes, it is best to wrap it in an insulated chicken intestine. Rat bites and other electrical issues are frequently caused by the wiring in the ceiling.
How to replace the recessed light bulb
The clips that are mounted inside of the ceiling hold the recessed light bulbs in place. A decent recessed light that clearly and safely shines through your ceiling is priceless. Poorly made lamp clips won't hold up, they might even pop and fall whenever the door is closed or someone goes upstairs. Lamps that require additional time to push and clip into position are a significant time waster.
While it's a good idea to switch to low-quality recessed lighting, it's much better to choose and use recessed lights from the start. In the long run, you will profit from spending a little more on a nice light bulb. You can have a hard time finding someone to handle a small project like changing a few recessed light bulbs
It's not too difficult to replace a broken recessed light bulb. You can make the necessary repairs at home without having to pay a repair company to do so. When performing operations, you should be careful. In addition, you need support tools when working with high ceilings.
When replacing recessed light bulbs, a small tip to keep power in place is to avoid using recessed lights to lift light up to the ceiling. Instead, you should push the light up by inserting your fist inside the lamp. Otherwise, grab the clamps after the light has passed through the ceiling hole.
Plan well to avoid patching light holes when installing recessed led lights
Recessed light bulb installation is inadvertently delayed, frequently by hours, by patching holes. Consider the cable lines, the precise location of the lights, and create a pleasing lamp pattern when making a wise and well-thought-out plan. If you're not a fan of planning, you'll discover that shingled roof patching, plastering, sanding, priming, and painting are considerably worse occupations than planning. Better recessed lighting is provided when a smart lighting design is made in advance, which also saves time.
Cut recessed bulb holes for just the right tolerance
The diameter tolerances for recessed lamps are extremely small. The lamp housing could fall through even a tiny hole in a wall if it is cut. If the hole is too small, it may be challenging to enlarge it without causing damage to the ceiling. When it comes to drywall ceilings, the professional electrician's maxim "measure twice, cut once" holds true.
Utilize the paper sample that was given to you by the maker of the recessed lighting. After that, confirm again that your ceiling saw's measurements are accurate. Cut holes precisely along the pencil-drawn line you made on the ceiling. Any deviation, even one centimeter, could allow the recessed light bulbs to fall in or out.
Pre-drill with a chainsaw and cut with a hacksaw
Although the hole saw may be adjusted nicely, it is not flawless. While ceiling saws can produce a lovely circle, if you cut all the way through, they occasionally cause a tear. Utilizing a band saw and a ceiling saw simultaneously is one trick. Use a ceiling saw to drill along the cut line in the plaster ceiling. Next, finish cutting the circle with the hacksaw. Anywhere you are, you can install recessed light bulbs with the help of this easy approach.
Work on the ground as much as possible
Working on a ladder uses up your energy more quickly than working on the ground while installing recessed light bulbs. Additionally, the likelihood of falls and injuries increases the longer one spends time on a ladder. Working as much as you can on the ground rather on a ladder will assist to relieve stress on your neck and legs.
You could even go outdoors in good weather to complete some tasks, like attaching cable clips to a box. When climbing down from the ladder, it's best to perform tasks like stripping and destroying cables. Only use your ladder when necessary to lift lights to the ceilings or make last-minute connections.
Fix the power cord before placing the light on the ceiling
You recessed light bulbs may be relocated by wires in ways that you hadn't intended. One or two power cords often enter your recessed light bulb. Since these cables are so strong, it is challenging to fit the lamp into the ceiling hole. With one hand, hold the light while using the other to form the cord. The cable will be more flexible as a result when you push the lightbulb into the hole.

Conclusion
Now, every house has recessed lights, giving the room a new, sophisticated, luxurious and comfortable color. Recessed lights are used in every family with the role of both lighting and decoration, creating accents by their beautiful, extremely beautiful design. Installation is not too difficult, above has detailed instructions on how to install flush mount lights.


